Blog Archives
Buying Guide : Wireless router for Home users.
Posted by Satyajit
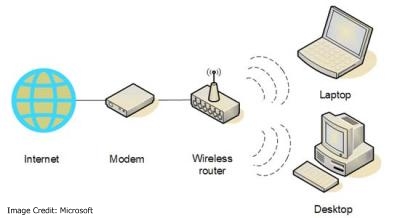
Looking to buy a wireless router for Home and confused with so many options and technical specifications? Do not worry,NetHunk has come up with a new series of buying guides and today in this series we are going to share the guidelines for buying a wireless router,happy huh :).Before going straight away into the guidelines we would like the readers to first sort out their own needs and prerequisites.Here we have listed out few of the deciding factors.

How to: Enable SSH access on Bluehost Account.
Posted by Satyajit
If you hold a web hosting account then i think SSH access to your hosting should be your top priority.Here we will get you through complete procedure of how we enabled it for our hosting (BlueHost). For those who are not aware of what SSH is all about, for them we have provided a brief explanation.
What is SSH ?
SSH(Secure Shell) is a secure and encrypted channel between computer for mainly data flow.Here we need to have a server and client for the communication.
Why we need SSH?
1.SSH(Secure Shell) as the name says is secure because the data that flows using this protocol is encrypted.
2.Its fast and easy to use.
3.It makes life easier for a webmaster to edit files but need Unix skills indeed.
4.Can also be used for Secure copy (SCP) and Secure File transfer (SFTP) also.
How to enable SSH access on BlueHost Account.
For some security reasons Shell account is not enable by default in your webhost.So,in order to enable SSH the hosting account should be verified.In-order to enable it follow the steps below.
1.Get in touch with the Bluehost Team through phone or Live chat and provide your hosting details for account verification.
2.They will ask for any ID proof/Credit card scanned copy etc for webhost account’s actual owner identification.
3.Once you provide the above information the account will be verified within 1hr you can enable SSH access too.
4.Assuming now the account is verified, login to the cpanel and click on SSH/Shell access icon under security.

5.Now click on “Manage SSH access” and enable SSH from the drop down as shown in the image below.
 6.Now that the SSH is enabled we need two keys(Public key and Private Key) to setup a successful communication.
7.Click on “Manage SSH key” and then click on generate a key and fill the below form then hit generate.

Note:Use RSA and key size as 4096 for maximum security and remember the password that was used.
8.Once the public and private key is generated down the private key to local host for the SSH client(Example:Putty) to make a secure connection.Finally SSH access on Bluehost Account is enabled.
How to access files using SSH on BlueHost Account?
We will be using Putty in-order to test SSH access on a Bluehost Account.Follow the steps below.
1.Download and install Putty.
2.Start Putty and under session fill the host name.

3.On LHS under SSH->Auth ,browse and select the private key file that was downloaded earlier in the managed keys steps.

4.Under Connection->Data,give the account username which will be prompted while logging in.

5.Now go to session section and give a suitable name to save the settings.
6.Select the saved settings click load and hit open, once the prompt provide the password to authenticate successfully.

If you have any queries then please comment below.
Why we need to clean Browser Private Data.
Posted by Satyajit
We connect to web through browsers.When ever we browse pages few temporary files gets stored in browser cache and login information in cookies.These private data are quiet helpful but at the same time pose a serious threat , below i have listed down few of the unethical consequences one may encounter with these data in there browser.

- Cookie hijacking: Suppose u are doing an online transaction or accessed your hosting cpanel and then after visit a low profile site.Then there are chances that your cookie can be used for some unethical purpose.
- Cache poising: It is mostly related to DNS poisoning but there in this context it is like exploiting your cache and retrieving some valuable information regarding your online presence.
- Browsing History Monitoring : Some people pile up there web history because it makes there life easier to visit the website from history and reduce the typing and searching but browsing history is more personal than your personal dairy these days so be careful.. 🙂
So, i would suggest one should set automatically clear the private data on browser exit or do so manually.
How to clean private data of the browser manually.
1.In order to clean the private data of browser manually Press hold Shift+Ctrl+Delete all at a time.
2.A popup appears, select the categories and hit enter then restart the browser to use again.
How to set the browser to clean private data automatically on exit.
Here we will cover the commonly used browsers Mozilla and Google Chrome.
Clear Private data in Mozilla automatically on exit.
1.Open Mozilla,under options browse to “privacy tab” and select the options as shown in the image below.

2.Restart the browser to use it.
Clean Private data in Google Chrome automatically on exit.
1.As of now there is no built in functionality in Chrome to auto clean the private data on exit but our purpose can be accomplished using a extension called as “Click&Clean“.
2.After installing the extension click on the small icon to the top right corner in order to open its option for “Click&Clean” as shown in the image below.

3.As shown in the image below check the option “Delete private data when chrome closes”.

The steps mentioned above can secure your online activities to some extent but we should remember not a single thing is 100% secure 🙂


